Source: How to access NAS on Mac

Want to get to your network-attached storage (NAS) devices on a Mac? It’s easier than you think on modern macOS versions, and it brings a number of great benefits, including the ability to access files across multiple machines simultaneously. It’s a lot like using a good cloud storage solution, but it has a number of advantages.
In this guide, we’ll show you how to connect to your NAS devices from within macOS.
Setting up your NAS
If you already have a NAS setup, connecting to it from your Mac should be simple. If you don’t, you’ll need to take care of that first. The process for this varies depending on the hardware you’re using, so we recommend consulting the user manual for your router to begin with. In most cases, the process should be like this:
- Connect your storage device to your router by USB or by ethernet if available.
- Access your router’s configuration portal by entering its IP address into your web browser. The address and login details you’ll need can usually be found on a sticker on your router.
- Look for the attached storage or external storage options, then follow the setup process. If this isn’t clear, or if you run into issues, contact your router manufacturer for support.
Note that your external storage device, which will ideally be an SSD for the fastest file transfers, should be prepared before you connect it to your router. If you’ve used the device before, it may be good to go already, but if it’s new, it will require formatting. Use the FAT32 or ExFAT formats if you want to access the device on both Mac and Windows machines.

Related
How buying a NAS can save you money vs. cloud storage
You can save money if you stick with it for long-term data storage.
Accessing your NAS on Mac
Once your NAS is up and running, it’s time to map the drive on your Mac like this:
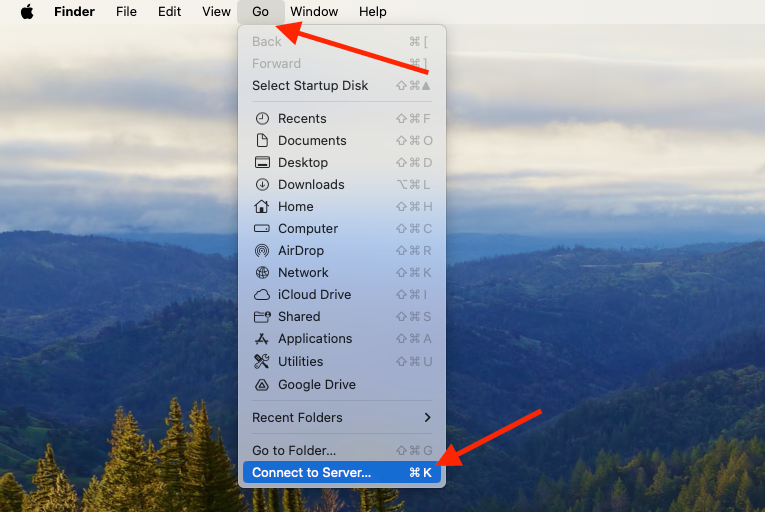
- Open Finder.
- Click Go > Connect to Server in the menu bar.
- Enter the location of the drive you want to connect to, which you’ll be able to find within your router’s configuration portal. It should start with afp:// or smb://, followed by an IP address.
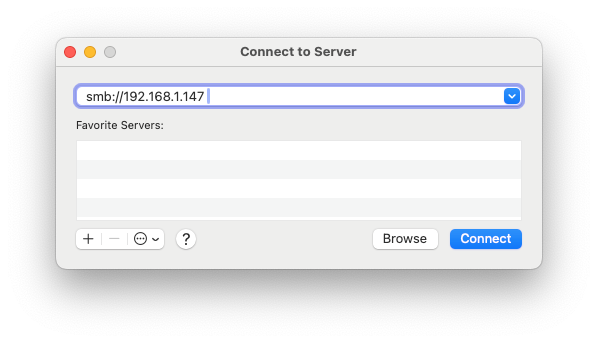
- Click Connect, then enter your login details if necessary.


Once your NAS is mapped successfully, you’ll be able to access it in Finder. It will appear in the Locations section alongside any other external or cloud storage solutions you’ve set up. Be aware that if you restart your Mac, the NAS will disappear from Finder, and you’ll need to repeat the steps above to connect it again. Alternatively, you can save yourself some time by mounting the drive automatically at login.

Related
How I used a mini PC like a NAS
If you want to turn a mini PC into a NAS, you absolutely can, and here’s what I used mine for.
Automatically mount NAS on login in macOS
To mount NAS automatically when you boot up your Mac, follow these steps:
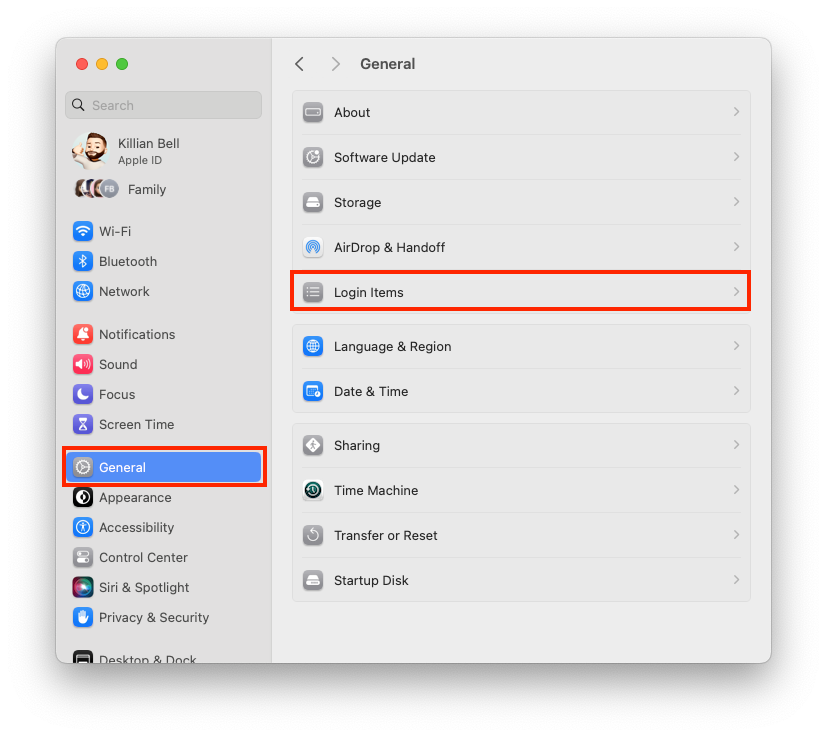
- Open System Settings on your Mac.
- Select General > Login Items.
- Under Open at Login, click the plus (+) button.
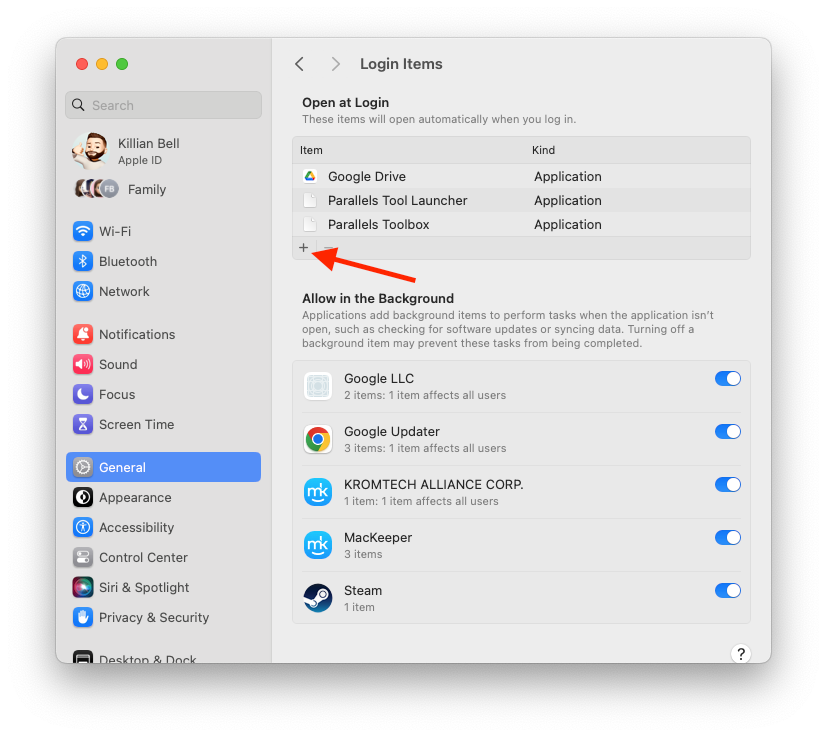
- Select your NAS, then click Add.


This only applies to the macOS user account you’re currently using. To automatically mount NAS for other users, you’ll need to log into their accounts, then repeat the steps above.

Final thoughts on accessing NAS on Mac
After you’ve completed the somewhat complicated process of setting up a NAS drive, connecting to it from your Mac is simple. It then acts like any other external storage device, giving you fast access to all your files across your home network. You can even use some NAS drives for Time Machine backups.
We recommend setting NAS drives to mount automatically at login if you’re going to be using them frequently, which will save you from having to connect to them manually every time you boot your machine, and don’t forget that you can also connect to NAS drives from other devices, including smartphones and tablets.
-
macOS
-
Other Hardware
-
macOS