Aug 17, 2016
1
Web hosting services and cloud solutions are convenient ways to access data and programs over the web. Self hosting has never been easier as it is now. The rise of Raspberry Pi, Chip, Beaglebone and other credit card- sized computers makes self-hosting an easy, cheap, and viable alternative. Whether you are looking to kick your monthly payments to a provider, or you are simply looking to learn more about self-hosting and Docker, this article is for you.
(Let’s be honest, there are plenty of you with a Raspberry Pi just collecting dust on the shelf. It is time to put it to good use.)
What is Docker?
Docker is an open-source technology that allows you create, deploy, and run applications using containers.
What does that exactly mean?
Docker allows you deploy technologies with many underlying components that must be installed and configured in a single, containerized instance. This is a big deal since trying to run software that is either your own, or open-source, may require dependencies and packages that you might not have installed. This can be a very time consuming and irritating process.
What is a container?
Containers have all the preconfigured packages that you need to run a particular piece of software. The beauty of this is that by keeping these containers separate, it allows you to have multiple containers running different software, without any conflicts between discrepancies. Docker takes all the headache out of this by running each service in a container, on a single host OS. This allows you to easily stop, remove, build, and run without any disruption to other services that may be running.
The big thing to take away from this is:
“This means that the software will run the same, regardless of the type of environment”
Docker Vs. Virtual Machine
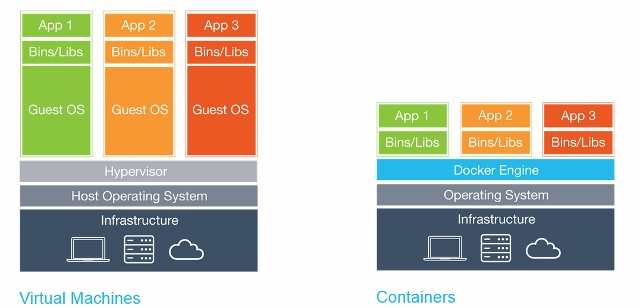
Containers allow for isolation at the OS level, while traditional VM’s offer isolation at the hardware abstraction layer. This means that you have a case for both depending on what you are trying to deploy. You can even deploy docker containers within each VM if you want to.
One thing is certain though, since you allocate space for one host OS with Docker, you save GBs of space from not having to deploy a whole OS for each application. Thus, Docker is ideal in our case for the use of deploying applications on a Raspberry Pi.
This guide will go through setting up Docker on your Raspberry Pi as well deploying to the web.
Required Hardware:
1x Raspberry Pi (1 or 2)
1x SD Card (Minimum of 4GB)
1x Router
1x Ethernet Cable
Setting up Docker on your Raspberry Pi
The people over at Hypriot have done a tremendous job with this. Use the following guide given your respective operating system:
How to get Docker running on your Raspberry Pi using Windows
This guide shows you how to get Docker running on your Raspberry Pi using a Windows workstation. If you have not read…
blog.hypriot.com
How to get Docker running on your Raspberry Pi using Mac OS X
This guide shows you how to get Docker running on your Raspberry Pi using a Mac OS X workstation. If you have not read…
blog.hypriot.com
How to get Docker running on your Raspberry Pi using Linux
This guide shows you how to get Docker running on your Raspberry Pi using a Linux workstation. If you have not read the…
blog.hypriot.com
Deploying With Docker
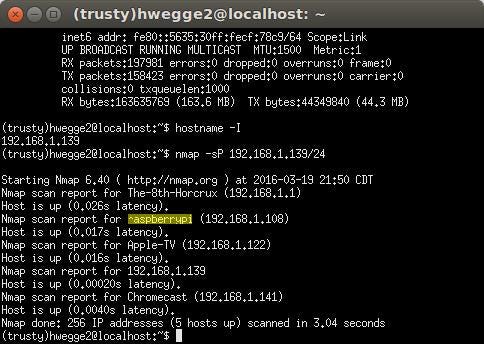
From here download NMAP for Linux or use Wireshark on Windows OS to find out the assign IP address for the device on your network.
sudo apt-get install nmap
Use the following command to find out you IP address
hostname -I
the following nmap command will allow you to scan a subnet mask for all available devices on your machine. Simply find the Raspbery Pi that is hosting your Docker container.
nmap -sP XXX.XXX.X.XXX/24
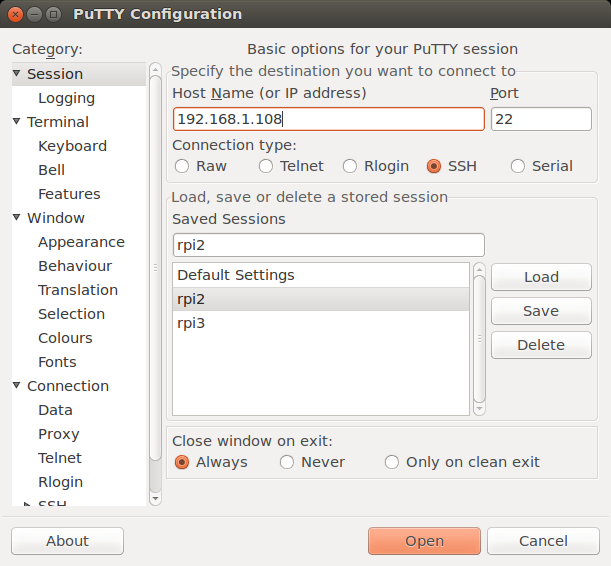
Once you SSH into the deployed Raspberry Pi type the following:
docker run -d -p 80:80 hypriot/rpi-busybox-httpd
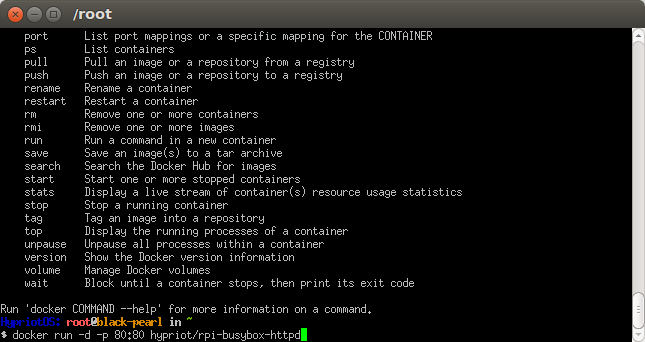
Open your browser on your own machine and type the address of the Raspberry Pi to verify it is all working.
After you are up and Running with HypriotOS, we can deploy applications from Docker Hub or your own built containers.
Remember that you must re-build containers on ARM if they were first built on x86/64 architecture or you will receive an error when you deploy like so:
FATA[0003] Error response from daemon: Cannot start container 0f0fa3f8e510e53908e6a459e817d600b9649e621e7dede974d6a65761ad39e5: exec format error
With that said, keep in mind you want to search for keywords like RPI or ARM on Docker hub.
Deploying Sites and Services to the Web
Now that we have deployed services locally, how will we get them to the web? Imagine what happens when you request a site. Your device has to check the server’s IP address, then make a DNS look up replying to the IP address. The browser then opens up a TCP connection to the server in which an HTTP request can go through. The information is sent over and and the browser determines how to display this information while also caching what it can for future requests.
Now imagine the Raspberry Pi being this server and your ISP provides you a router with a unique IP address. More specifically, your ISP is sending the request to port 80 (as this is the default port for HTTP).
What we want to do is simply forward a request over the Web through your router to your Raspberry Pi.

We want to implicitly select which ports we want to expose so that they may be accessed over the Web. This enables specific port forwarding on your router so you don’t expose all in bound traffic from coming through your firewall.
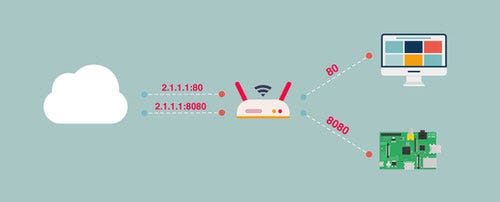
Use the following guides to set up port forwarding given your respective router:
Setting up Port Forwarding on a Belkin router
We make people-inspired products and solutions. From wireless home networking and entertainment, to mobile accessories…
www.belkin.com
How do I configure port forwarding on routers with the NETGEAR genie interface? | Answer | NETGEAR…
Article ID: 24046| 8,684 people found this helpful This article applies to routers with the NETGEAR genie interface. To…
kb.netgear.com
Linksys Official Support – Setting up Single Port Forwarding on Linksys Smart Wi-Fi Routers and…
Belkin International, Inc., including all affiliates and subsidiaries (“Belkin”, “us” or “we”) thanks you for choosing…
www.linksys.com
Remember that you can expose multiple ports so that different services deployed by Docker can be used. Some examples are as followed:
Deployment of a Cloud9 web IDE instance on port 8181
docker run --name rpi-cloud9-ide -it -d -p 8181:8181 -v ~/projects:/workspace hwegge2/rpi-cloud9-ide node server.js -w/workspace --listen 0.0.0.0 -a :
Deployment of Gogs: a self hosted Git server on port 8022
docker run -d --name my-go-git-server --publish 8022:22 --publish 3000:3000 --volume `pwd`/gogs-data/:/data hypriot/rpi-gogs-raspbian
Once port forwarding is setup correctly, it’s time to get your own Domain
Since you know your IP address, you should already be able to access your Pi, but you can also purchase or freely obtain a DNS (Domain Name System) from sites such as:
Premium DNS Hosting | Bullet Proof DNS Security & Hosting – GoDaddy
Manage and protect your DNS with GoDaddy Premium DNS Hosting services. Easy to use advanced DNS management service and…
www.godaddy.com
Google Domains – Google
A full set of simple-to-use, robust domain management tools are at your disposal: Set up Dynamic DNS to keep your…
domains.google
For free alternatives and the sake of this tutorial, we will use the following:
FreeDNS – Free DNS – Dynamic DNS – Static DNS subdomain and domain hosting
Why is it free? It’s quite simple. We wanted a challenge… that’s it. Possible Uses: Host your own site on your own…
freedns.afraid.org
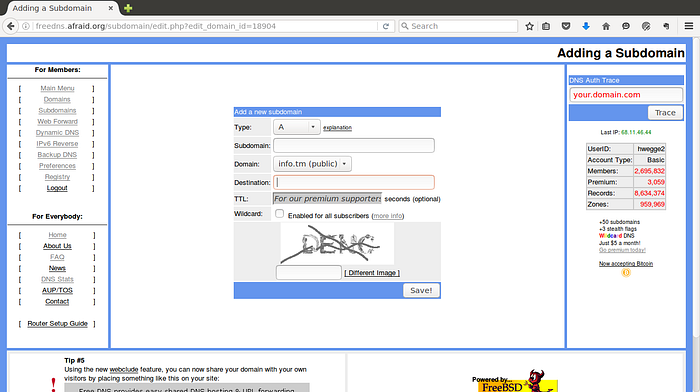
Register and then select a sub domain that you would like to use.
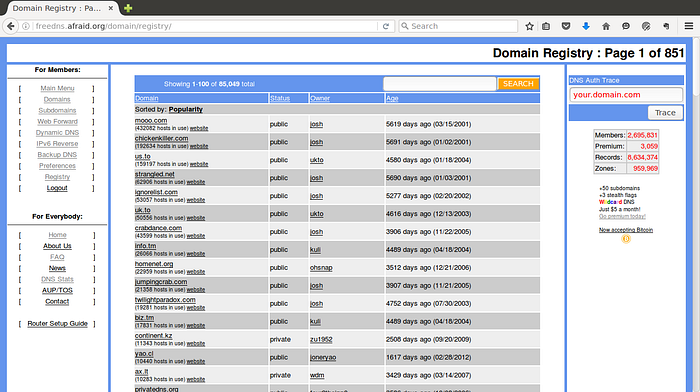
Then simply type the sub-domain (i.e http://yourname.info.tm) followed by your IP address.
It is also worth mentioning that popular ports may be quickly blocked by your provider.
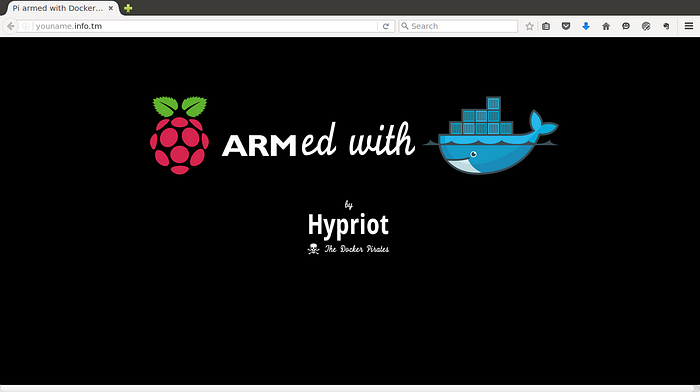
Now that you have a domain, you can access your sites and services from anywhere with an Internet connection. Just remember not to get too popular, or your ISP may have something to say about it. If you have any questions, feel free to drop them under the response section. Happy Hacking!
-Hans